Doctors
Overview
The customer entity is the main customer relationship management component. This comprehensive guide will walk you through creating and managing customers within the system.
Understanding Customers
Before creating a customer, it's essential to understand how doctors relate to offices in the system. A doctor can be assigned to multiple offices, creating what we call the "customer". Each customer represents a specific person at a specific location and can have its own unique settings, such as a pricelist, a billing account, and a client portal account.
Here's an example of two different doctors working at the same office, each making a distinct customer that is connected to the same billing account:
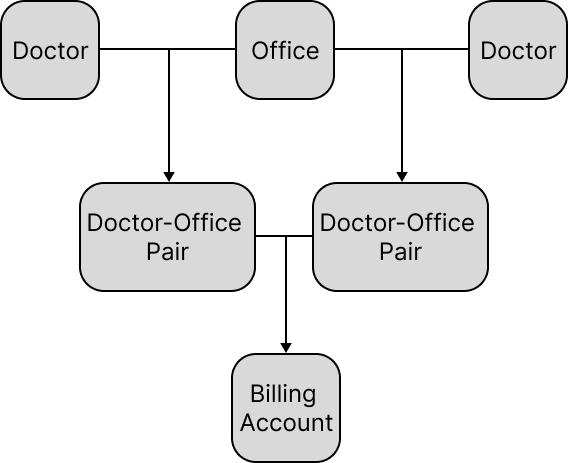
When you select a doctor on individual case view, you're actually selecting a specific Doctor-Office pairing. Think of it as: "I am creating an order for this specific doctor at this specific location."
Here's the most basic customer structure required to create and invoice cases in our system:
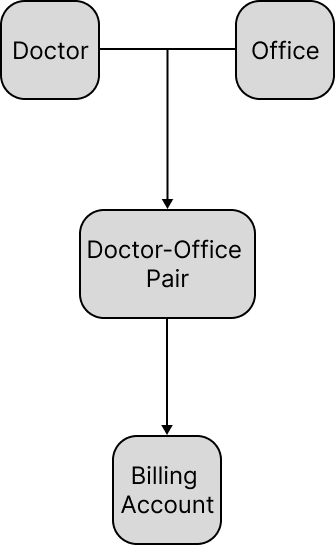
Even though cases reference customer to determine product pricing, when you invoice those cases, neither doctors nor customers receive invoices directly – the associated billing accounts do.
What if you have multiple doctors in the same office and they all want to receive the same bill? What if they want a bill per doctor? What if a doctor owns multiple offices and simply wants to get one invoice? Billing customers wouldn't work in those situations.
Creating a Doctor
Before you begin, you need to have "Create" permissions for the doctor entity. Once you have the necessary permissions, navigate to Clients → Doctors and click on the "Create Doctor" button.
Required:
- Name.
- Status. Only doctors that don't have "Deactivated" status can be selected on case view. Doctors with status "Hold" can have a hold reason specified, but you are not allowed to invoice their cases. Doctors with "Prospect" status will have their status changed to be "Active" as soon as we receive their first case.
Optional:
- New Doctor. If this is checked, you will see a "New Doctor" yellow badge on case view.
- Case Warning. This warning will appear on the case view under the case number whenever you select this doctor. It can be used to provide additional information about the doctor or their office.
- Salesperson.
- Preferences. These are clinical preferences that will appear on the case view under the doctor notes.
- Custom Fields. These are additional fields that you can add to track information that we don't provide the fields for by default. You can add custom fields in Admin → Settings → Custom Fields.
To create a doctor, you need to select an office – a physical location where the doctor operates. Since a doctor can work at multiple locations, you can select multiple offices.
For each selected office, these are the required fields:
- Pricelist. Sets the prices this doctor-office pair will receive for your products.
Each doctor must have at least one office assigned to them at all times. A doctor cannot exist in the system without being associated with at least one office.
- Sub-Account Name. In situations where you use "Detailed Billing" on the selected billing account, this name is necessary for your accounting system. We pre-fill it for you, but you're able to customize it.
Optional fields:
- Billing Account. If the selected office has a billing account, it will be pre-selected for you without the ability to change it. If the office does not have existing doctor-office pairs with an associated billing account, or if all doctors in the office receive individual bills (i.e., the billing account for each doctor-office pair is different and is of "Doctor" recipient type), you can select a billing account.
If you don't specify a billing account, we will allow you to select this doctor-office pair for your cases, but invoicing them will fail.
After Doctor Creation
After creating a doctor and configuring their office assignments, you gain access to additional management features:
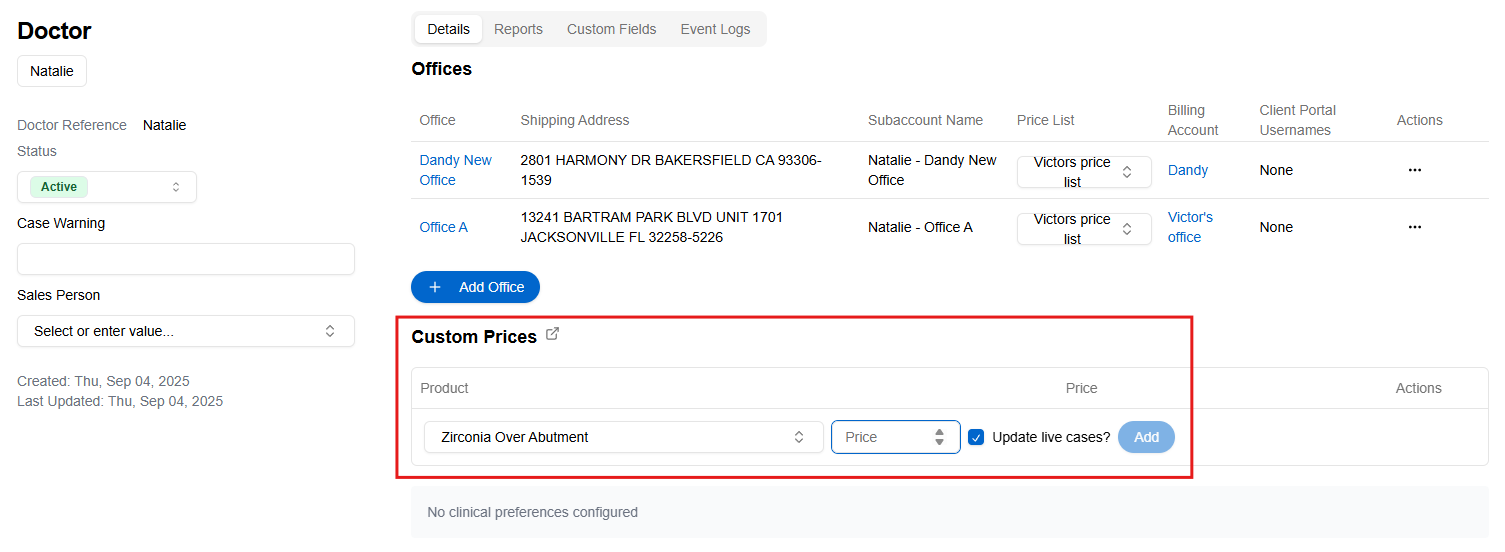
Custom Pricing
Set doctor-specific prices that override standard pricelist pricing
- Create custom prices for specific products or services
- Override standard pricelist pricing for special arrangements
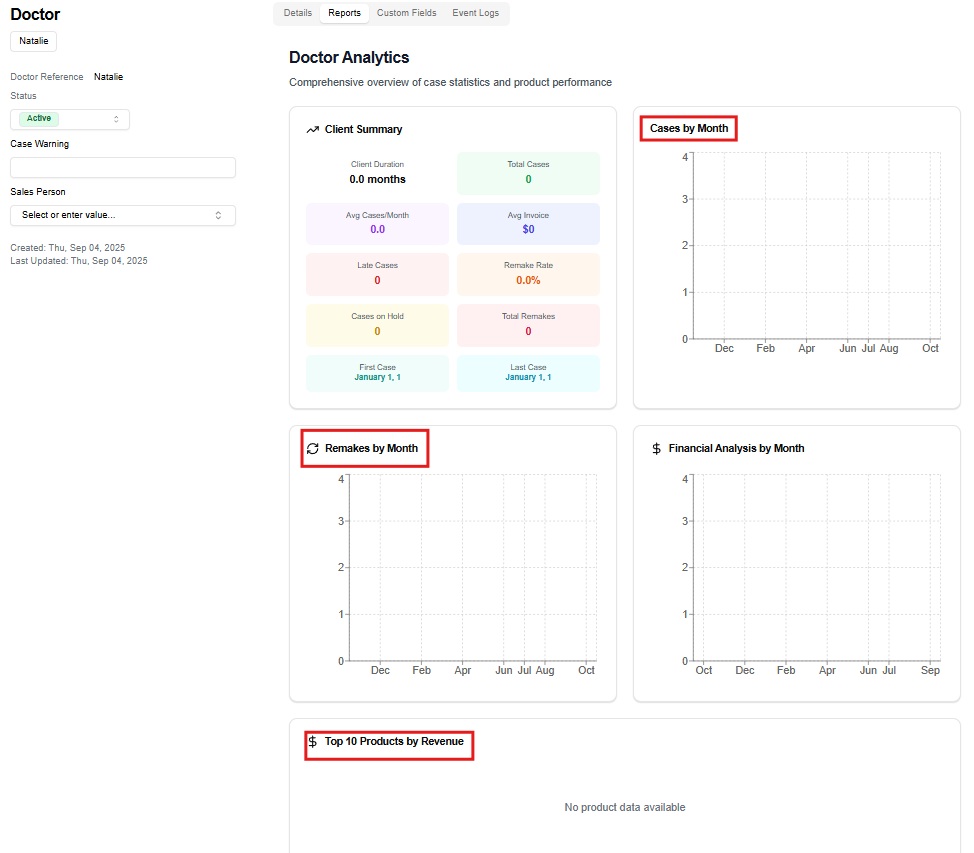
Doctor Reporting
- Case volume and trends
- Remake rates
- Product statistics
Clinical Preferences
These are doctor preferences related to lab's procedures and products. The preferences are created and settings and can be managed for individual doctors.
Creating Preferences
- Go to Admin -> Settings
- You can add new Preferences, delete the existing ones, and manage preference values (add/delete/make default for lab).

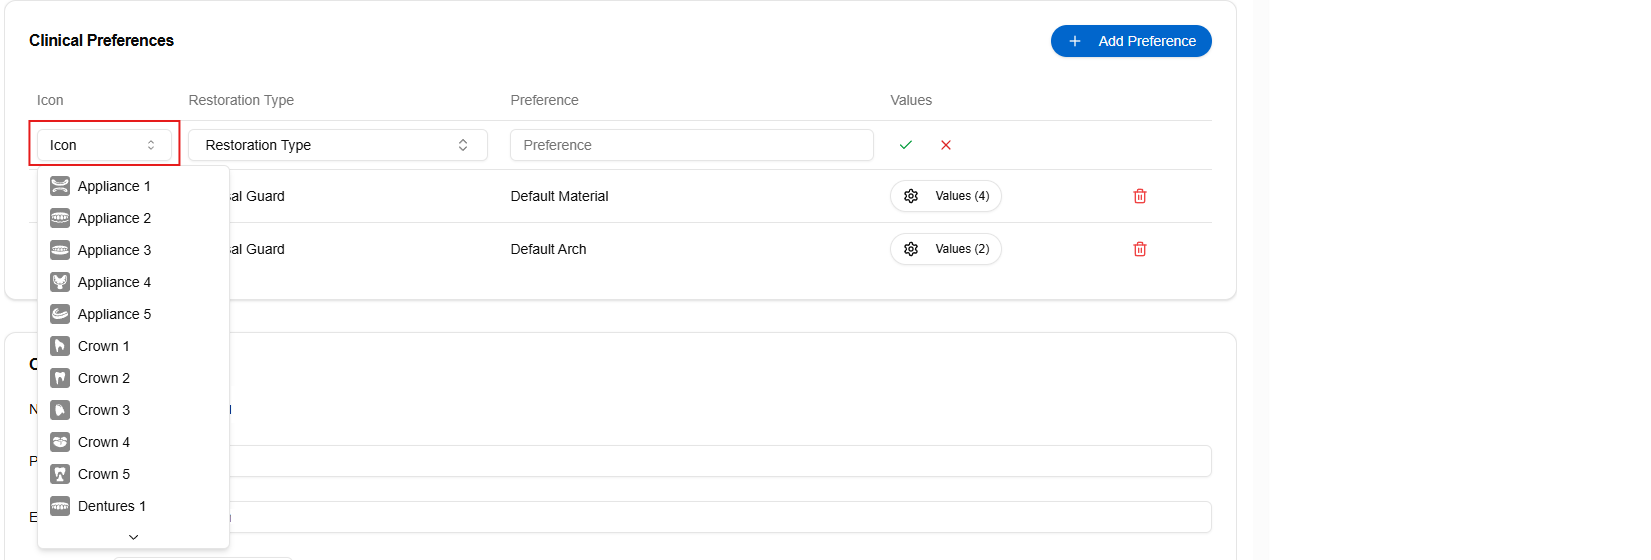
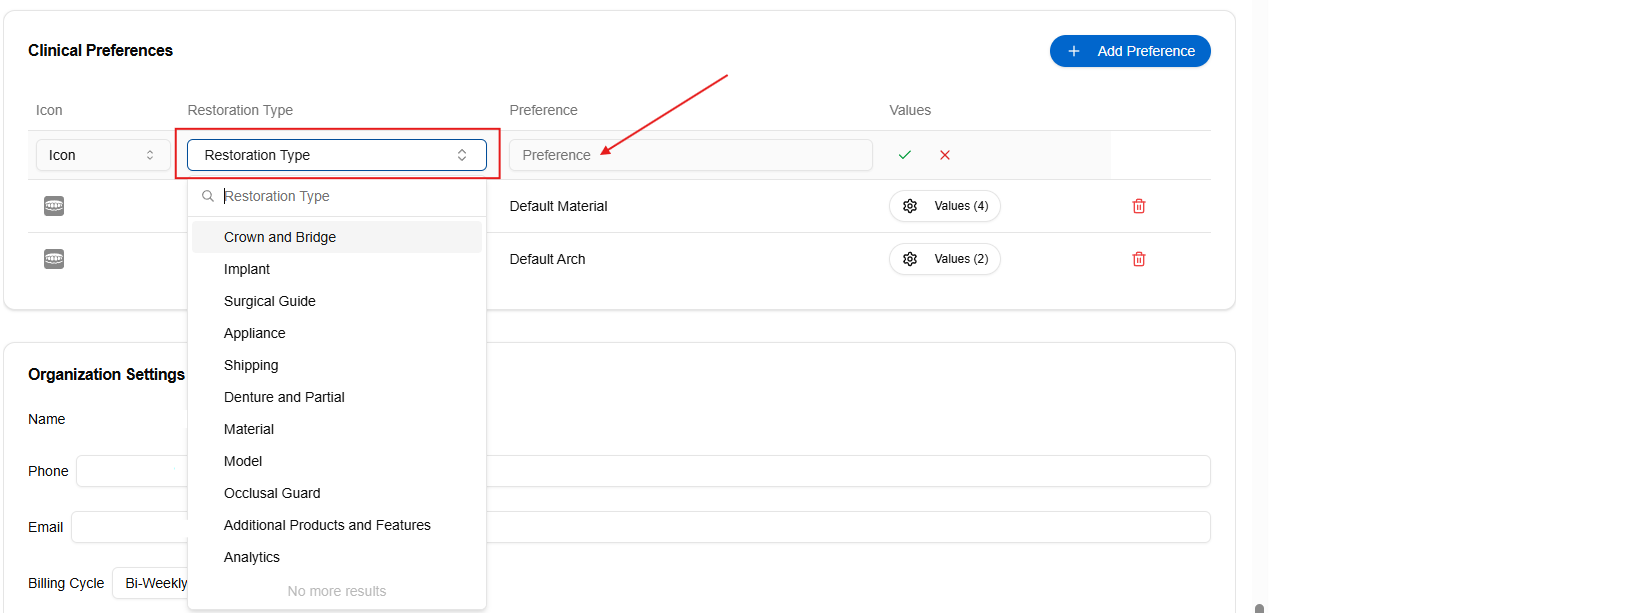
When you add a preference, choose an Icon, Restoration Type, and name the Preference:
Editing Doctor's Preferences:
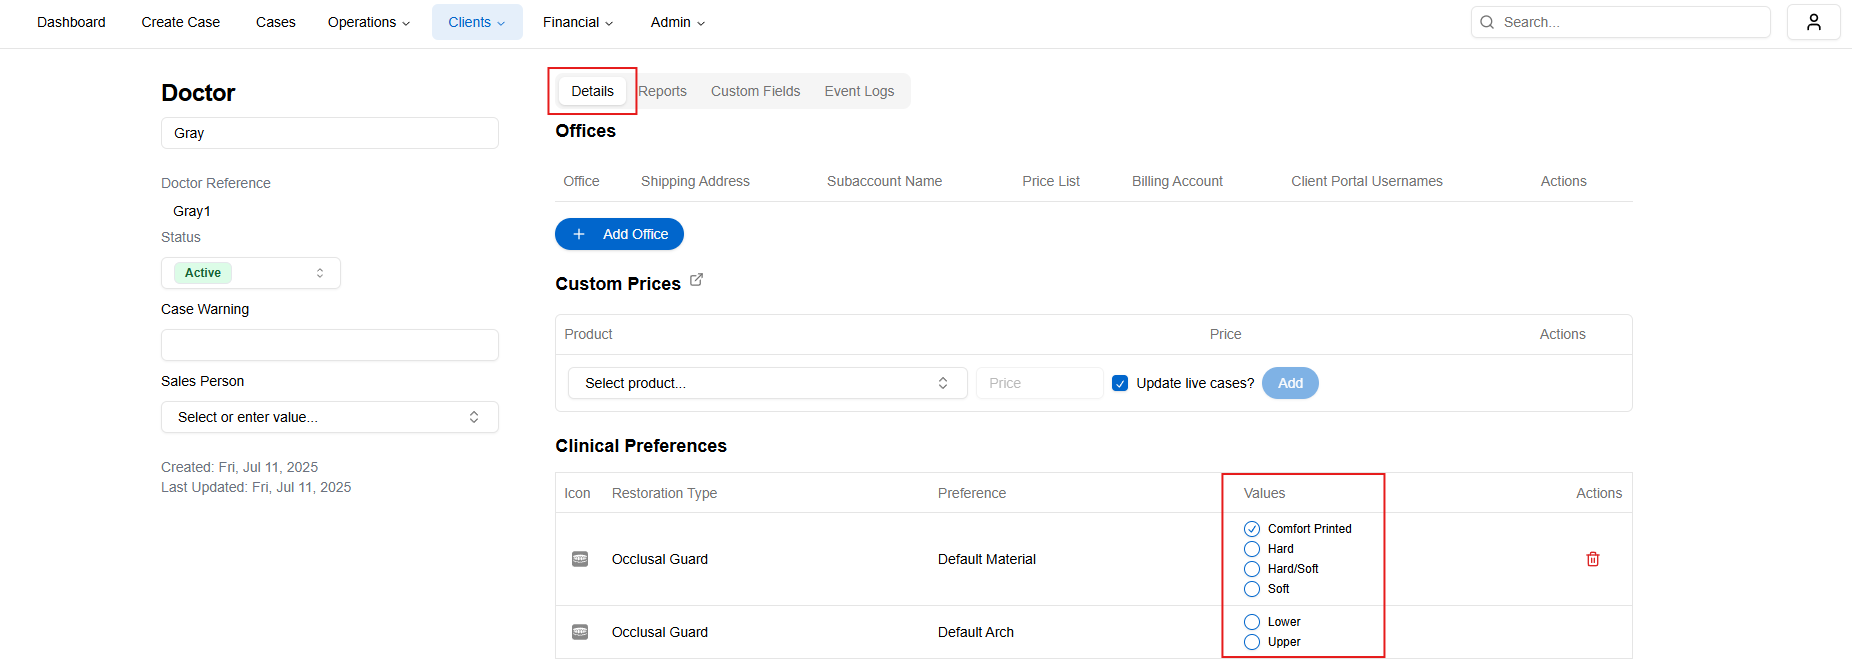
- From the Doctor page, navigate to the Details tab
- Your preferences will display below and you can choose specific values
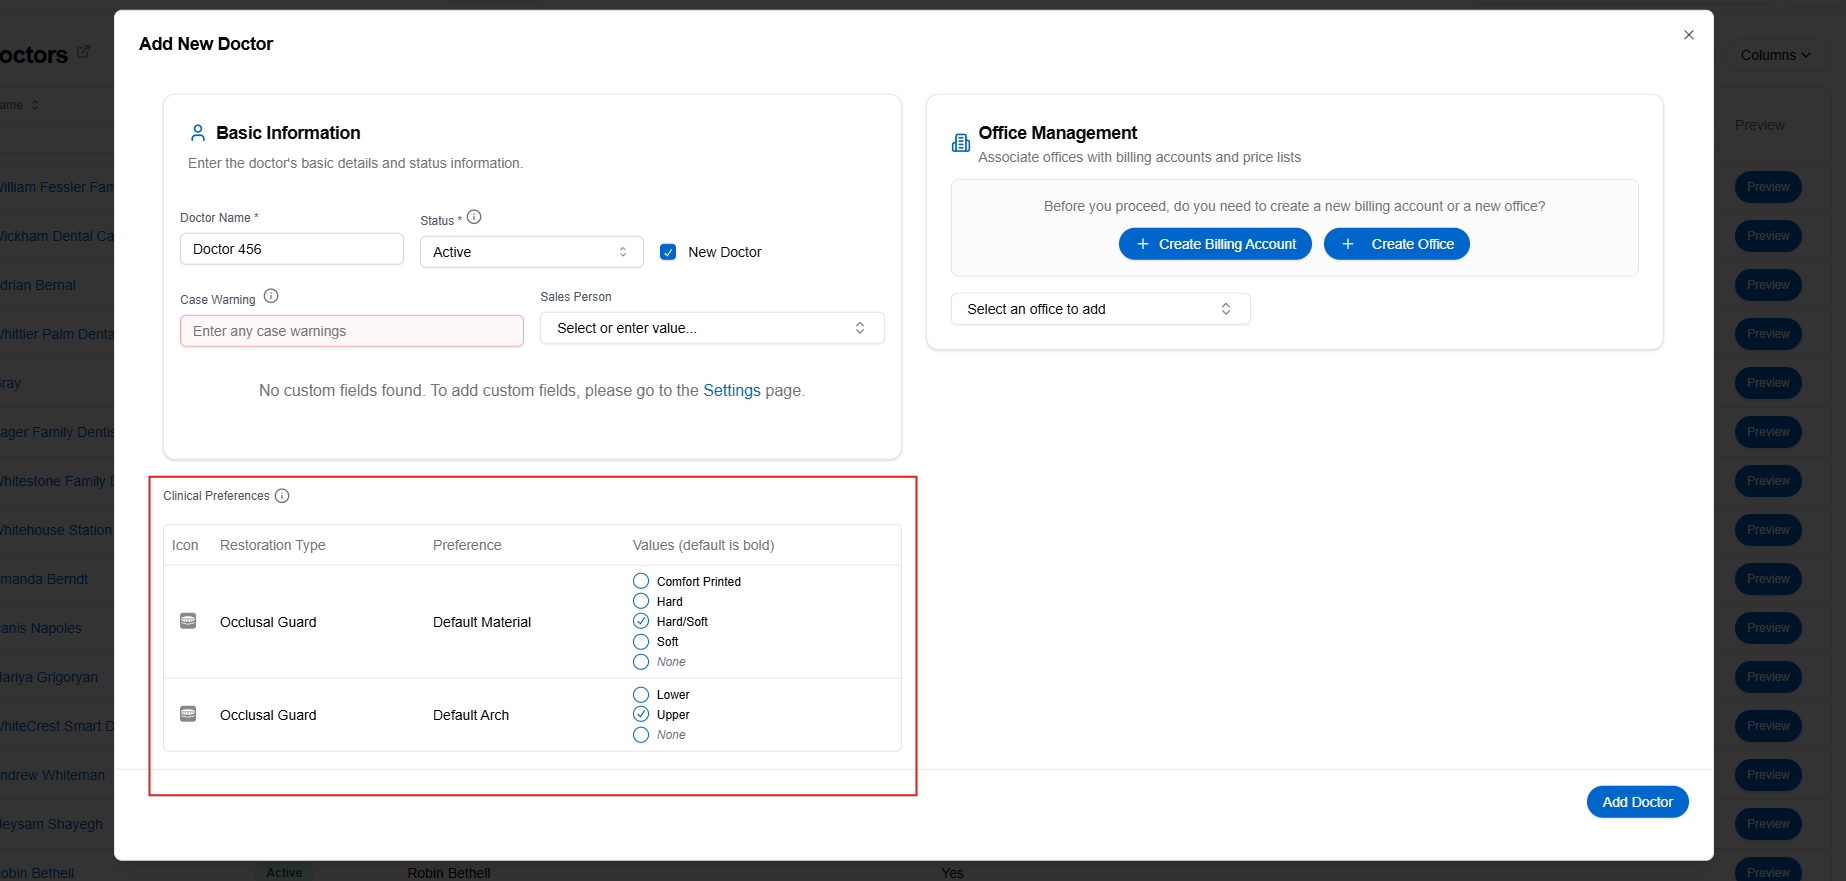
You can also manage preferences during doctor creation:
- From the Clients -> Doctors page, click + Add Doctor button
- Select values for your Clinical Preferences from below
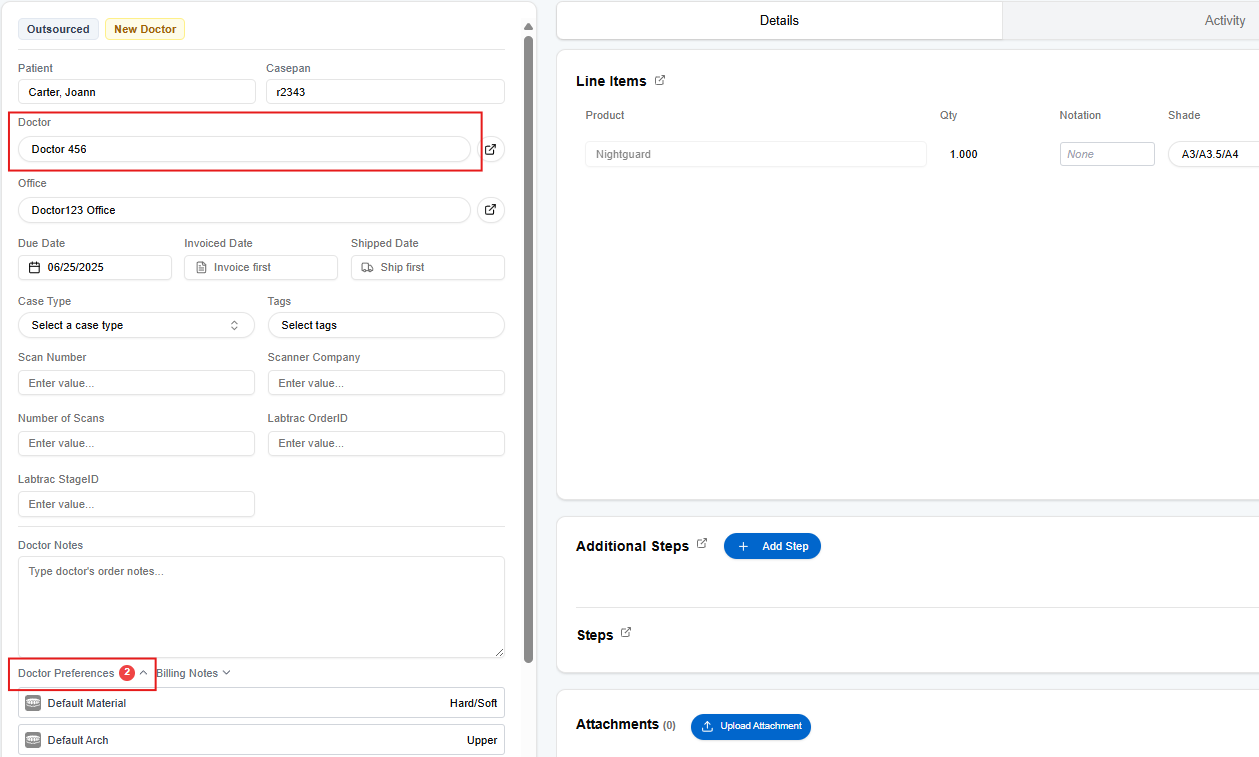
On Cases:
- The doctor's preferences is shown below Doctor Notes
Event history log
These are technical logs that allow you to track individual changes made to the doctor entity.