Offices
- Doctors and doctor-office pairs.
Overview
An office is a physical location where your doctors operate. It is essential to understand how offices relate to doctors in the system, as each doctor can be associated with multiple offices, creating unique Doctor-Office pairs. This relationship is explained in detail in the Doctors documentation.
Creating an Office
Before you begin, you need to have "Create" permissions for the office entity. Once you have the necessary permissions, navigate to Clients → Offices and click on the "Create Office" button.
To create an office, you need:
- Name.
- Tax Area. This area will be used to calculate tax amounts for taxable products on the cases created for doctor-office pairs associated with this office.
- Shipping Address. This address is used for shipping cases to this office.
- Default Shipping Route. This route will be used for all shipments to this office unless overridden at the case level.
Optional fields:
- Group. You can assign the office to a group for better organization and management.
Shipping Addresses
Address needs to be validated if you're using UPS, FedEx, or USPS shipping integrations. To validate an address, there are two options:
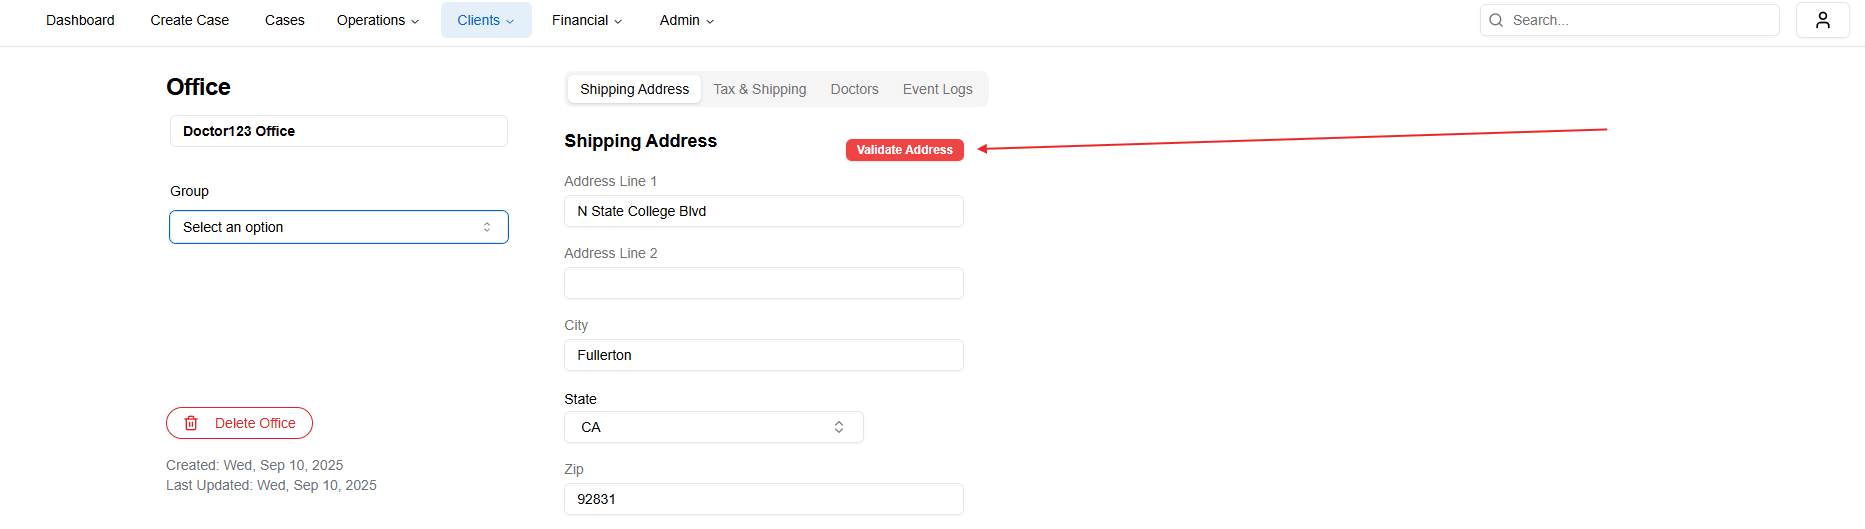
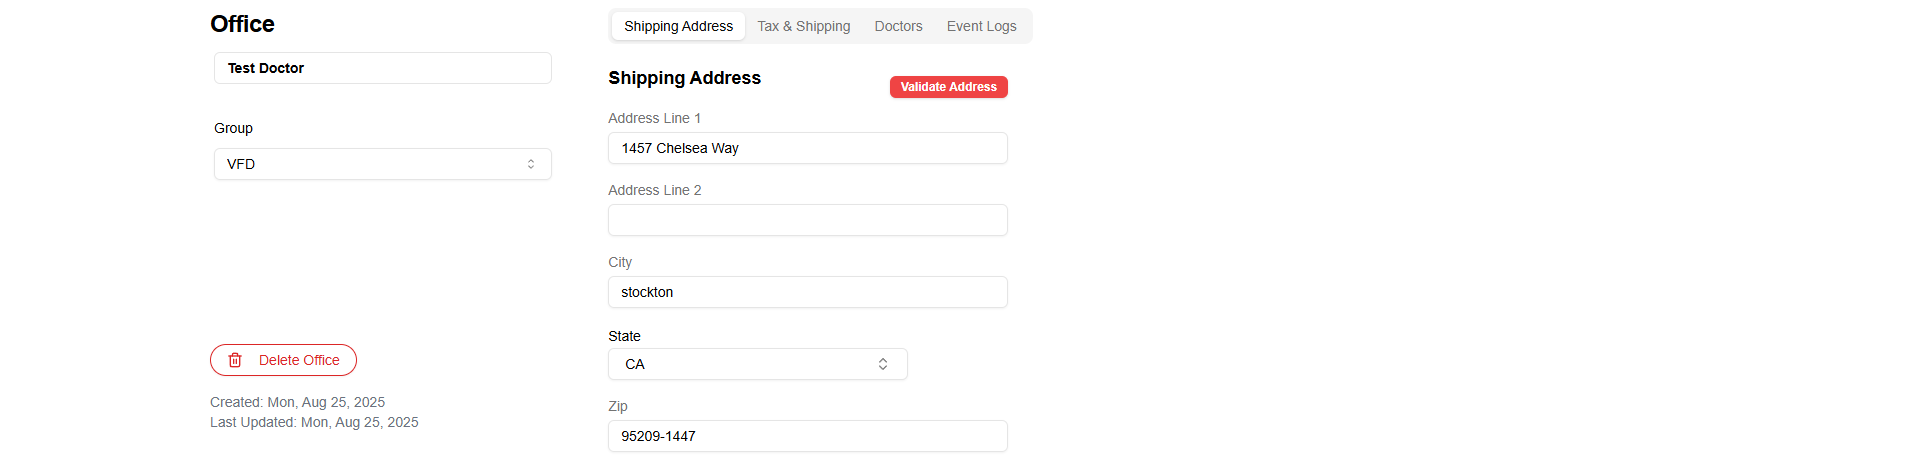
Individual office view
-
Open the office page: Go to Clients -> Offices and toggle to the Shipping Address tab
-
Click on the red button Validate Address
-
The dialog popup will display your current address on the left side and the recommended address on the right. You can either keep the current address, accept the new one, or accept the new one with edits.
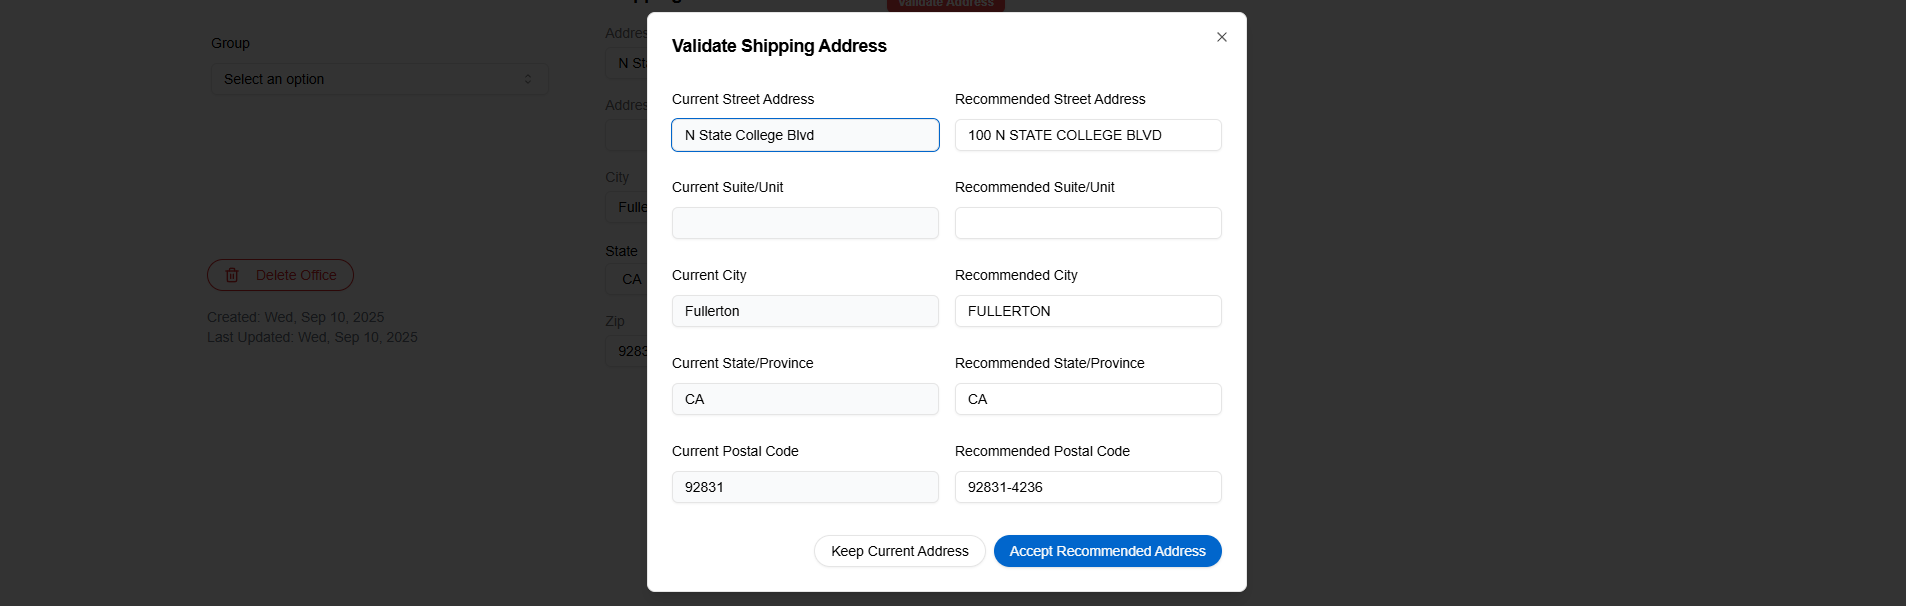
- If you accept the new address, the status becomes Validation Ran and Accepted

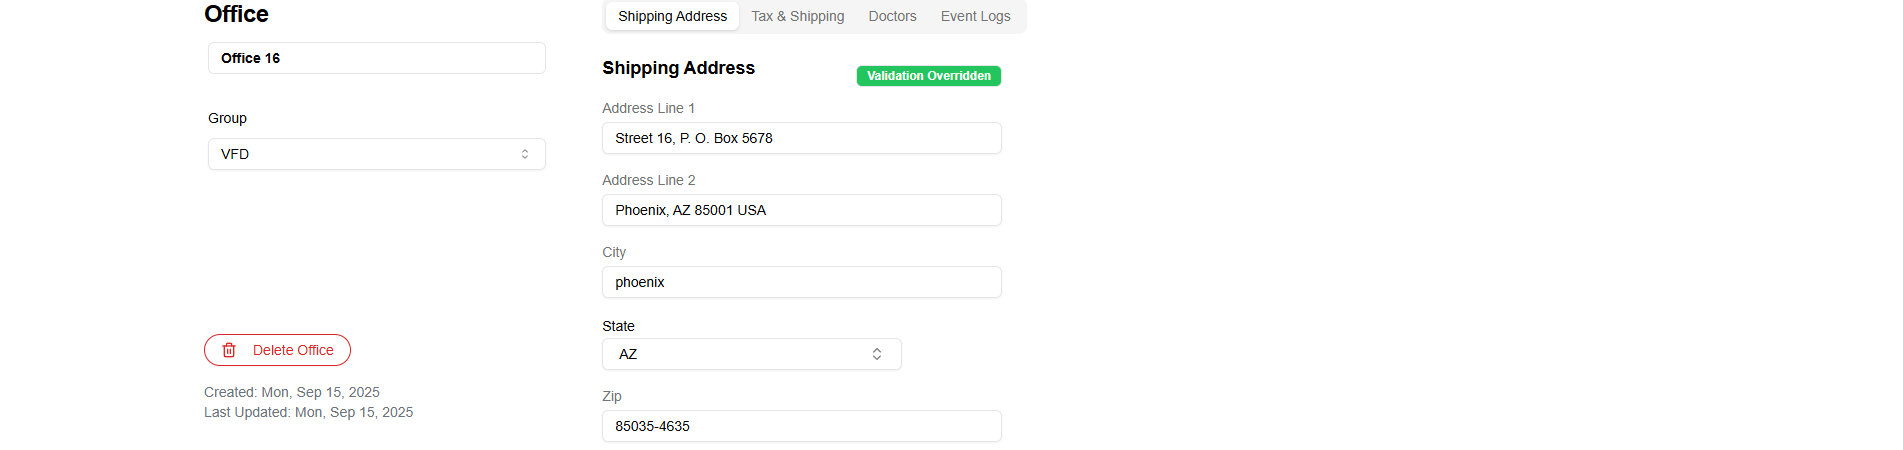
- If you accept the current address, or if you make edits to the recommended address, the status becomes Validation Overridden
- If you close the pop-up, the status will remain unvalidated and display Validate Address
Every time you change the address, the validation status will reset. You can validate it again using the same methods.
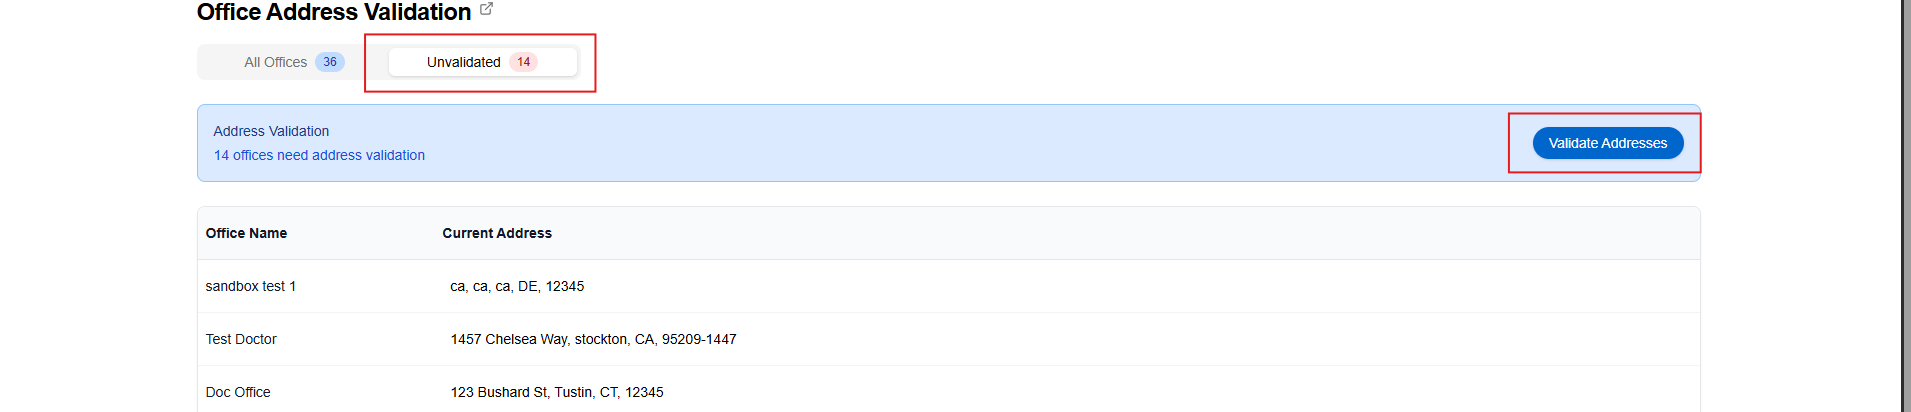
Bulk Validation
- Go to Clients -> Address Validation

- Toggle to the Unvalidated tab -> Click Validate Addresses. You'll be able to see the recommended addresses and accept original or new ones.